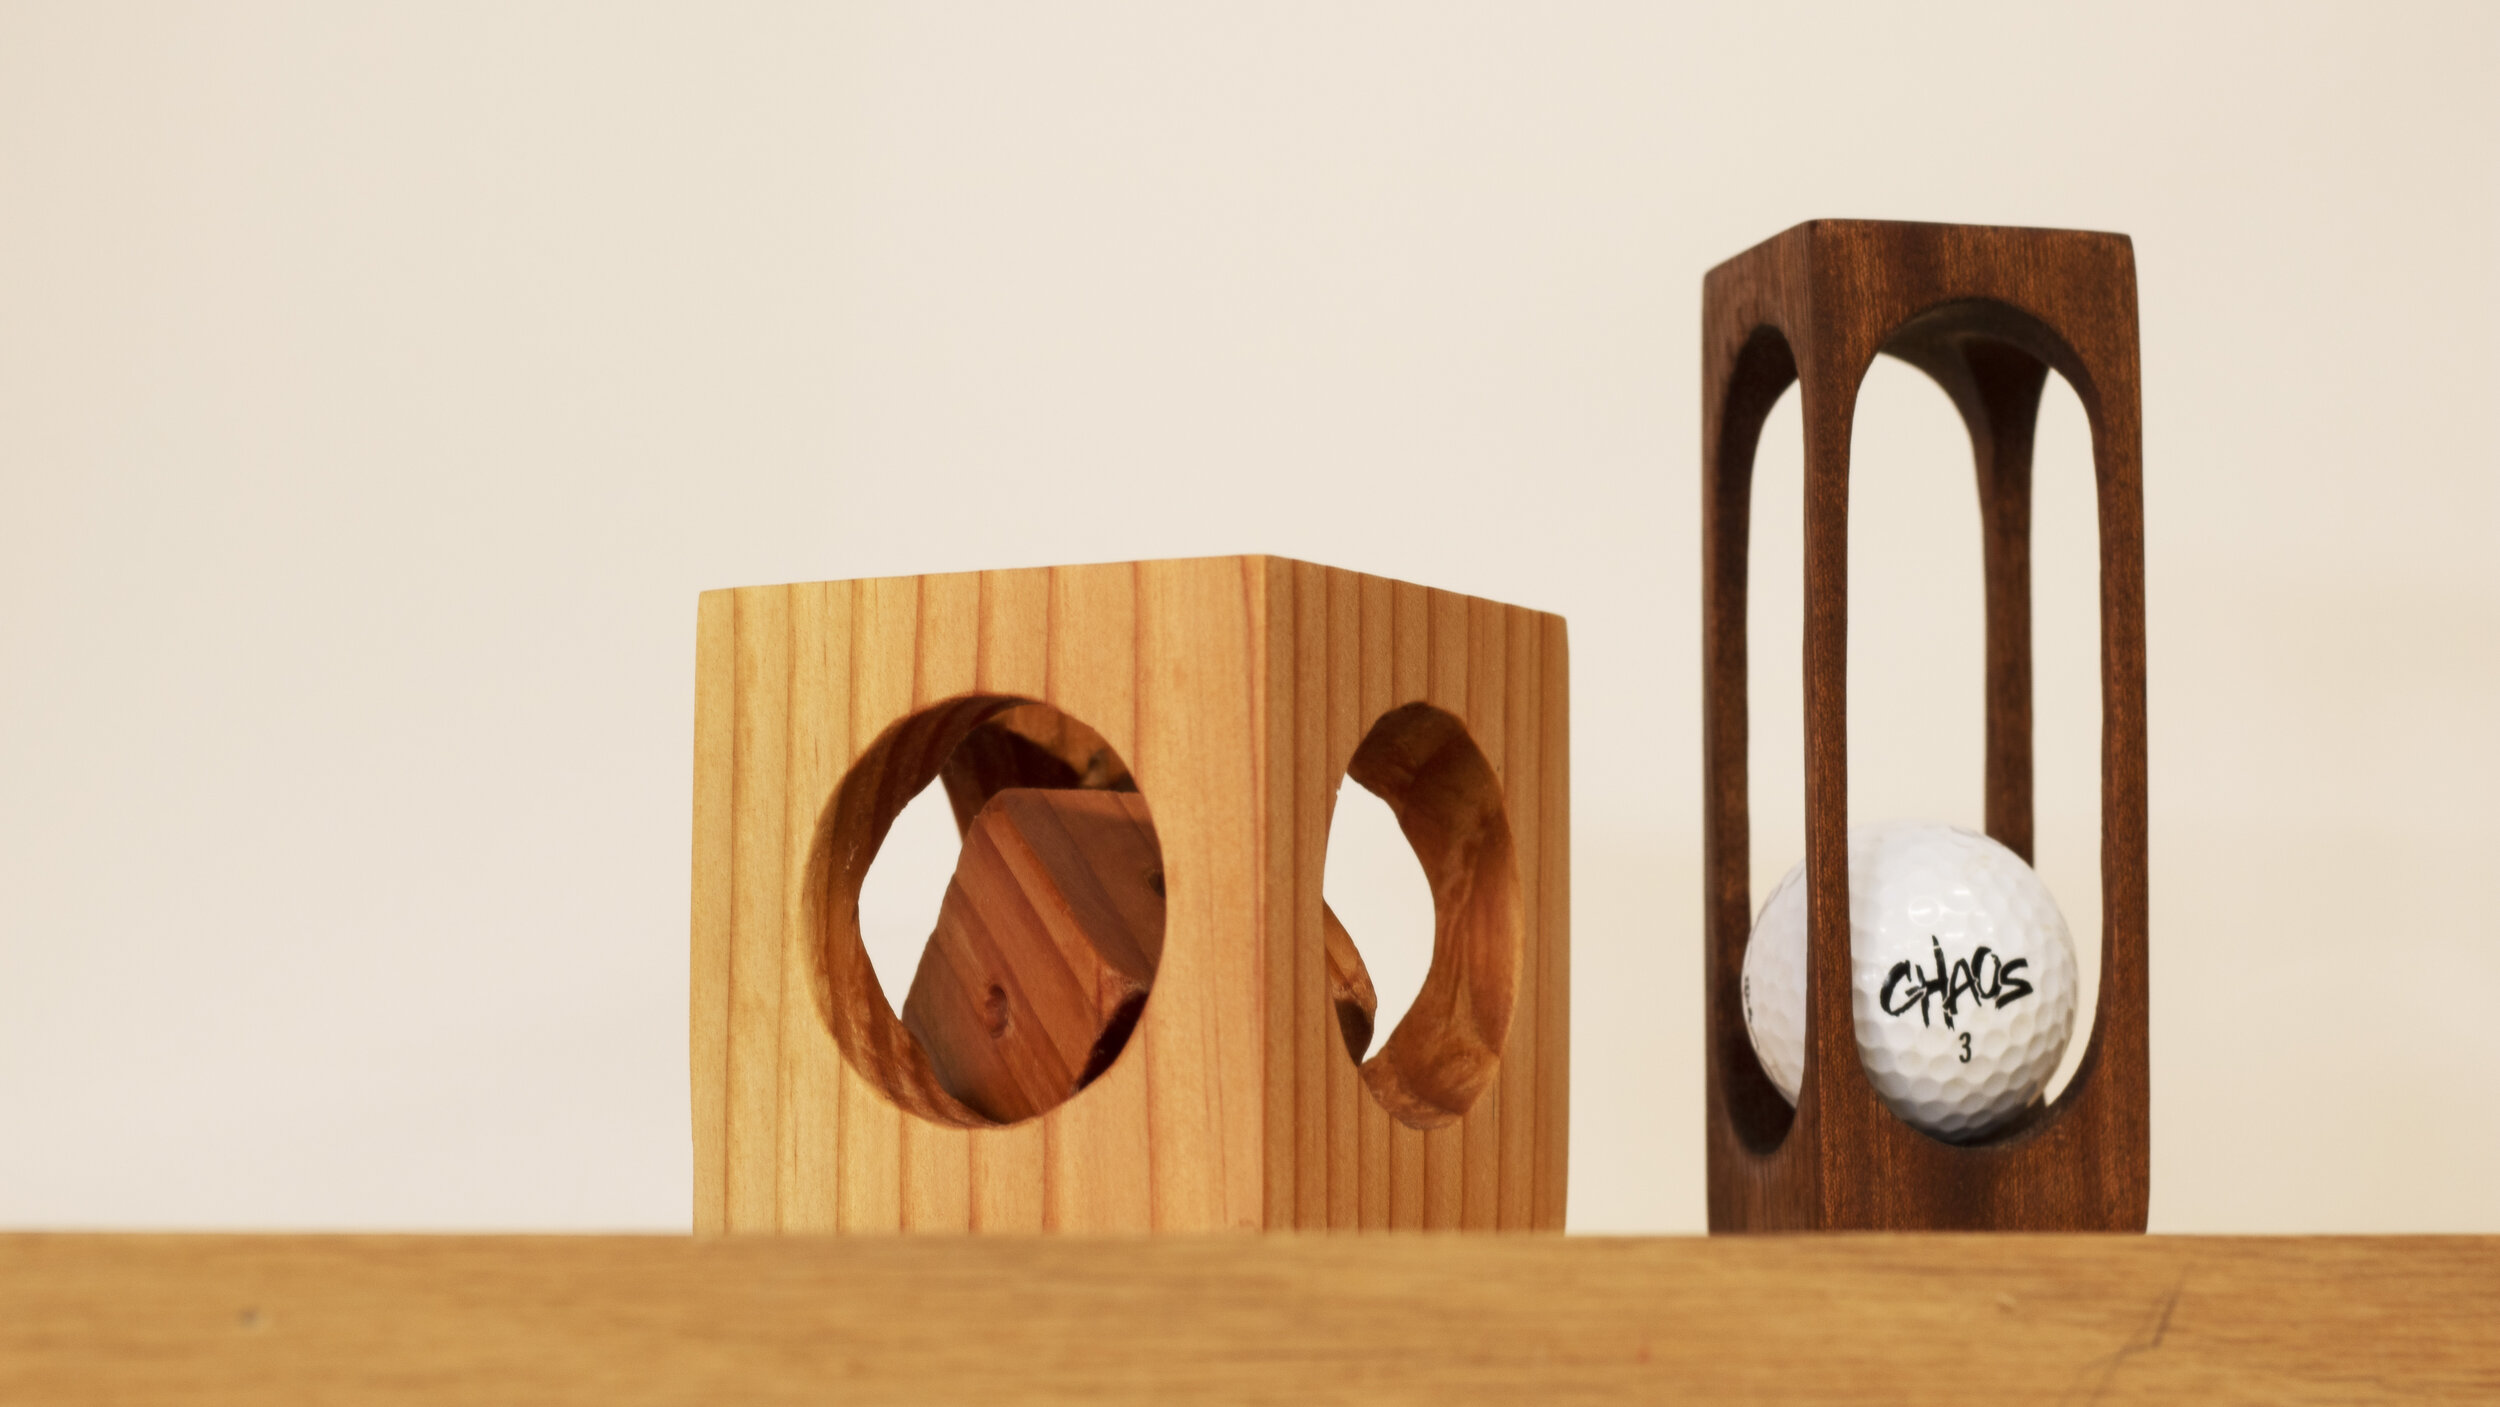
Fun Scrap Wood Projects - Magic Golf Ball and Cube Within a Cube
Do you have a bunch of scrap wood laying around your shop and taking up space? Well, today I’m going to show you a few projects that are easy to make and perfect for scrap wood. The Magic Golf Ball and the Cube Within a Cube are something fun to do in the shop and make for great conversation pieces.
If you like this video please click here to subscribe to my channel
Supplies:
List of tools used in this build:
Select and Cut Wood for Impossible Golfball Project

I figured that this piece of Sapele, leftover from a cutting board project, would work great for the golf ball cage. The piece already had two square and flat sides so I squared up the two remaining sides on my planer to a final dimension of 1 3/4” by 1 3/4.”

Next, I took it over to the miter saw and cut a piece 5” long.
Mark Guidelines for the Drill Press

Using a ruler I marked a line 3/8” from both ends and then marked a line down the center lengthwise. I flipped the block over and did the same thing on an opposite face.

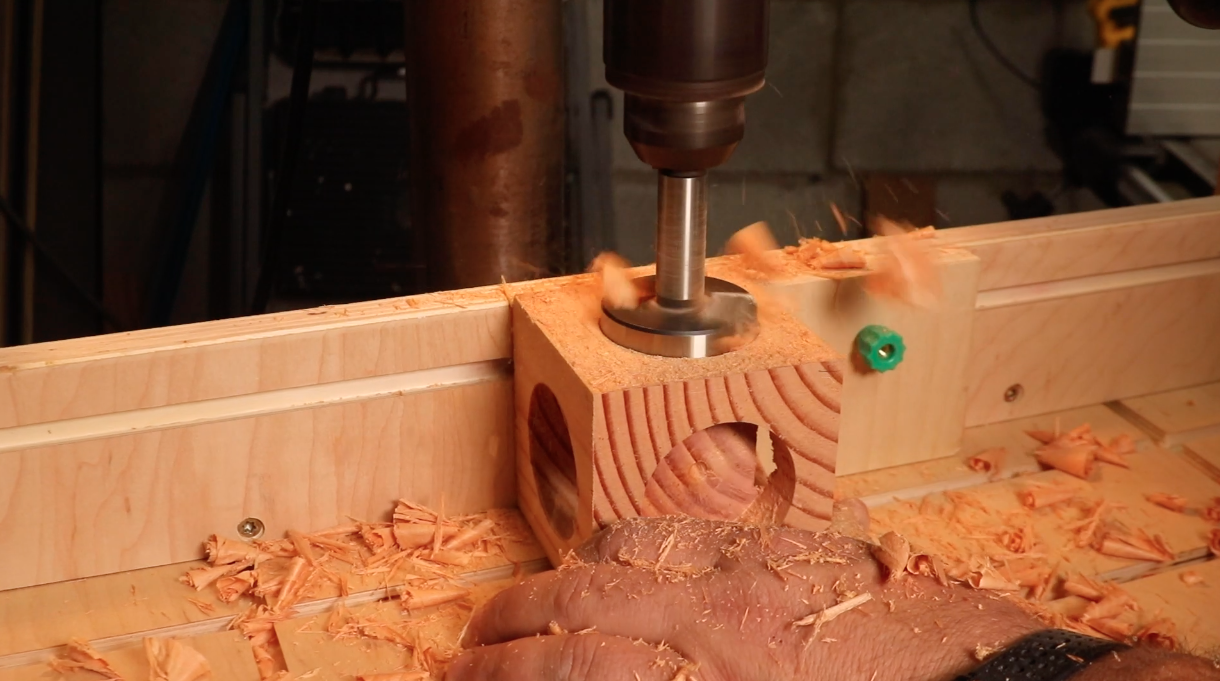
Drill Out the Center Area

Over at the drill press, I set my fence so that my forstner bit lined up with the center line marked on the piece of wood. I used a 1 1/4” Forster bit to drill these holes. I also set two stop blocks so that the edge of my forstner bit stopped at the two end lines which will help me be consistent and accurate on both faces. I started by drilling the first two holes at each of the ends.

Don’t forget to clean up the shavings regularly so that they do not get in between the fence, or stop blocks, and the block of wood. This would lead to misalignment of the holes as they were being drilled.

After that, I drilled out the area in between the first two holes and cleaned it up the best that I could with the bit

Then, I flipped it to the opposite face and did the same thing.
Sand the Wood Smooth

got out the spindle sander and cleaned up the inside edges from the drill press. If you don’t have a spindle sander this can be done by hand sanding.

Thats what I keep my shop helper around for.
Submerge in Hot Water and Insert Golfball

As you can see, a golf ball can not fit in between the this tight space which is what makes this project so fun.

The trick is to heat some water to almost boiling and submerge the wood in the water for about seven or eight minutes. This makes the wood more pliable and allows the spindles to flex enough for the golf ball to fit through.

I removed the wood from the water and with a little pressure the golf ball popped right in.

Pretty neat, huh?
Now, this project isn’t quit done yet so make sure you stick around to see how I finish it up.
Select and Cut Wood for Cube Within a Cube Project

Next up, I grabbed a 4x4 post that I had in the corner of my shop for about 2 years. Im not sure what I thought I could use it for but I held on to it none the less. I squared it up on the planer and left each side 3 1/4” wide.

I used my miter saw to cut off a section at 3 1/4” so that I had a cube that was equal on all sides.
Mark Lines to Find Center of One Face

Using a ruler I found the center of one side by drawing a line from one corner to the opposite corner and forming an X. Try to be as precise as possible with these lines so that the center mark is accurate.


A little trick I learned from Steve Ramseys video on this project is to mark an X in the same corner of each face. This will help with accuracy if your cube dimensions are a little off, which I’ll explain what the marks are for in just a second.
Drill a 1/8" Deep Hole, Mark and Set Depth

I set my drill press fence and stop block so that my forster bit came down precisely on the center mark. Im using a 2” forstner bit to drill these holes and I set my drill press at its slowest speed. I placed the cube on the drill press so that the mark that I made in the corner was up against my fence and the stop block. I will make sure that the mark that I made on each face is in this same position as I drill the holes. Once everything is set, I lowered my bit until I drilled a hole about an 1/8” deep and stopped.

I used my pocket square to mark a line where the two previous lines contacted the circle. This is how I determined the depth of the holes that will be drilled on each face of the cube.

I placed the cube next to the drill bit and set the depth stop to stop the bit about 1/8” short of the line.
Drill to Depth on All Sides
Next, I started drilling a hole in each face to the depth of the depth stop. I started with the end grain sides to prevent chipping as the cube in the center starts to develop. The end grain is much harder to drill through so I just went slow and took my time. You can see the center cube start to develop as I drill the holes in the face grain.

After that I set the depth stop to drill about 1/16” deeper and then went back over each hole. You do not want to go too deep with these holes and push the center cube out with the Forster bit. This could cause it to chip or crack.

Instead you want to stop just shy of the final depth so that all is left are small tabs in each corner. Then, I was able to use my knife to finish the cuts through the tabs and release the center cube.
Finish Sand Both Projects

Okay, now its time to get some finish on these two projects. One important thing to remember on the Magic Golfball is that after submerging the wood in water the grain is going to raise and the entire thing will feel rough even though you already sanded it. Just give it a quick hand-sanding with some 220 grit sandpaper and it will smooth right out.

Im not going to sugar coat it, the cube within a cube is not easy to sand. I just did my best and tried to smooth out any rough spots or hard edges that someone may touch while picking it up and fidgeting with it.
Apply Oil and Finish

For the finish I would recommend some type of wipe on oil finish and I went with an all natural oil that I use for cutting boards. There are a few great brands out there and Im using Howards. I figured that this all natural finish would be easy to apply, bring out the grain the in sapele, and I liked that thought of it being an all natural finish since kids and such will be handling and messing with these things trying to figure them out. Ill let these sit for about 20 mins before wiping off the excess and then they will be good to go.